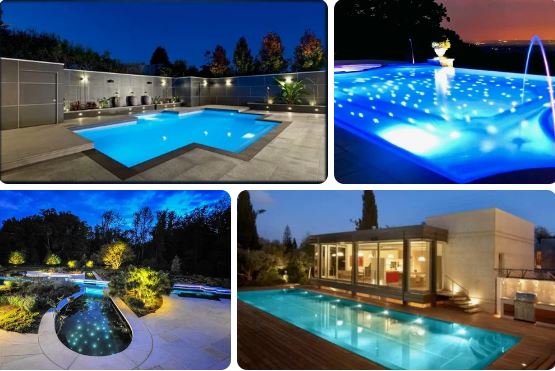
Having worked extensively in the realm of pool lighting, I’ve encountered a myriad of challenges that homeowners face with their swimming pool lights. One memorable experience was at the villa of Mr. Roy M. Meadows, nestled in the serene outskirts of the New York City. Mr. Meadows had an exquisite pool that became the centerpiece of his evening gatherings. However, one summer evening, the vibrant lights beneath the water’s surface flickered out, casting a shadow over the anticipated pool party.
The task at hand was not just about replacing a bulb; it was about restoring the ambiance that Mr. Meadows’s pool offered to his guests. Upon inspection, I discovered that the issue was not with the light itself but with the water-sealed compartment that housed it. Over time, the seal had deteriorated, allowing water to seep in and compromise the electrical connections. The repair process involved carefully draining the area around the light, replacing the compromised components, and ensuring the seal was more robust than ever.
This experience underscores the importance of regular maintenance and the know-how to address issues promptly. For those looking to embark on pool light repair, understanding the structure of your pool’s lighting system and the common issues that can arise is crucial. Whether it’s a simple bulb change or a more complex wiring issue, knowing how to fix a pool light can save your pool party from sinking into darkness.

The structure of the swimming pool system
Light Fixture
The pool light fixture houses and protects the bulb and electrical components from water intrusion. It typically consists of durable materials like stainless steel or plastic and features a waterproof gasket and a clear front lens that allows light to pass through. Inspect the fixture for any cracks, corrosion, or damaged seals that may compromise its watertightness.
Wiring System
The electrical wiring system supplies power to the pool light. It runs from the main electrical panel through waterproof conduits to each light fixture. Ensure that all connections are secure and водонепроницаемый and comply with electrical codes. Inspect the wires for any fraying, cuts, or damage that could lead to electrical hazards.
Control System
The control system enables you to turn the pool light on or off, adjust its brightness, and set lighting schedules. This system can range from simple manual switches to sophisticated remote-controlled or app-controlled systems. Check the control system for any malfunctions, loose connections, or damaged components that may hinder the operation of the light.
LED Pool Light Repair
If you have an LED pool light, troubleshooting can be quite simple. Check the power supply to ensure it’s working correctly. If the power supply is functioning, inspect the LED bulbs for any burnouts or damage. LED bulbs can typically be replaced individually, making repairs more cost-effective than replacing the entire light fixture.
Underwater Pool Light Repair
Underwater pool lights require special attention due to their exposure to water. If your underwater light isn’t working, start by checking the electrical connections in the junction box. Look for any loose wires, corrosion, or damaged insulation. If the connections are secure, you may need to remove the light from the pool and inspect it for any water intrusion or damage.
In some cases, a pool light replacement may be necessary. If the light fixture is severely damaged, the wiring system is compromised, or the control system is beyond repair, it’s best to replace the entire unit. Choose a replacement light that is compatible with your pool’s size and shape and meets the necessary safety and performance standards.
Why Your Pool Light Isn’t Working?
When Power Exists
- Light Fixture or Bulb Issues: If the pool light is not working while power is present, check for faulty light fixtures or bulbs. Start by replacing the bulb. If the issue persists, the light fixture itself may need replacement. Ensure the replacement fixture is compatible with the existing niche.
When Power is Lost
- Water Inside the Fixture: A lack of power indicates a potential issue with water seepage. This suggests a leak from a damaged lens or conduit seal. Gaskets play a vital role in preventing water from entering the fixture, so check and replace them as needed.
Importance of Gaskets
- Water Damage and Safety Hazards: Gaskets protect pool lights from water damage and associated safety risks. Exposure to chemicals and water pressure can deteriorate gaskets over time. Regular inspection and replacement are crucial to maintain optimal gasket performance.
Safety Concerns
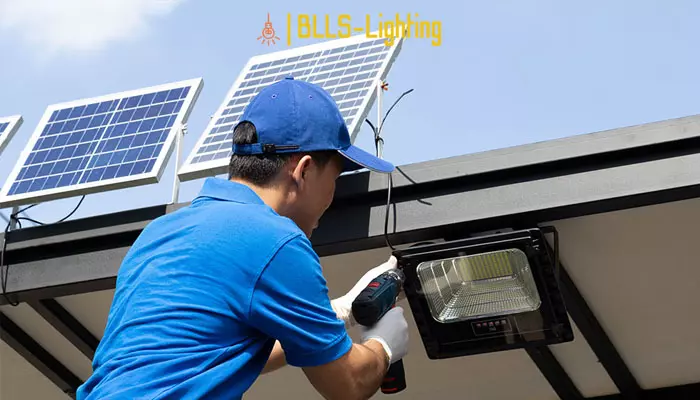
Do Not DIY Electrical Repairs: For electrical issues involving pool lights, always seek professional assistance. Attempting DIY repairs on electrical components can pose safety hazards. Trust qualified technicians to ensure safety and effectiveness in resolving electrical issues.

Symptoms indicating that the pool light needs repair
Light Doesn’t Turn On
Potential causes for a pool light not turning on include power outages, tripped circuit breakers, faulty bulbs, or a malfunctioning electrical component.
Diagnostic Steps:
- Check if the pool power is on.
- Inspect the circuit breaker panel and reset any tripped breakers.
- Test the GFCI outlet for proper functionality.
- Replace the light bulb with a new one of the same wattage.
Light Flickers
Flickering pool lights can be caused by loose wiring, faulty bulbs, or moisture entering the fixture.
Diagnostic Steps:
- Secure all wire connections within the light fixture.
- Replace the light bulb with a new one.
- Inspect the fixture for any cracks or damage that may allow moisture to enter. Reseat the gasket or replace the fixture if necessary.
Water Inside the Light Fixture
Water can enter the light fixture due to a compromised seal or cracks, leading to short circuits or other electrical hazards.
Diagnostic Steps:
- Inspect the seal and gasket around the fixture for damage or improper fitting.
- Check the fixture for any cracks or damage.
- Re-install the fixture after replacing the seal or gasket.
- Test the light to ensure that no water enters the fixture.
Check the GFCI: When Pool Lights Malfunction
Malfunctioning pool lights can often be resolved without draining the pool. Before taking drastic measures, check the circuit breaker. If it’s tripped, turn off the pool light and reset the breaker. If the circuit breaker trips repeatedly, it may indicate a short circuit, requiring professional attention.
Next, inspect the Ground Fault Circuit Interrupter (GFCI). GFCIs are sensitive circuit breakers that prevent electric shocks by tripping when detecting a minute current leak. Locate the GFCI near the main electrical panel, pool filter subpanel, or an adjacent outlet.
Press the test button on the GFCI while the pool light is off. If it pops, power is reaching the GFCI. If it doesn’t, press the reset button and attempt to turn on the pool lights. If the light illuminates, condensation in the fixture may have tripped the GFCI. Seal or cover outlets on the same circuit to prevent humidity-induced false trips.
If the GFCI trips immediately after flipping the pool light switch, water penetration within the fixture is a likely culprit. Alternatively, if the GFCI remains intact but the light won’t power up, the bulb may be faulty. In either scenario, remove the light fixture for further inspection and potential repairs.
Pool light repair: How to fix a pool lights quickly

Before undertaking any pool light repair, it is crucial to adhere to the following guidelines:
- Step 1: Turn off the electricity supply to your pool from the breaker box.
- Step 2: Activate the ground fault circuit interrupter (GFCI) to ensure that electricity is not flowing through the circuits.
- Step 3: Utilize a non-contact voltage tester on your light switch while toggling it on and off. This test confirms that electricity is completely off by detecting any present electrical activity. This device, also known as an electrical test meter, can be purchased at any hardware store for a cost ranging from $10 to $30. (Recommended: Fluke 1AC II VoltAlert Non-Contact Voltage Tester).
- Step 4: Keep dry towels readily available.
- Step 5: There is no need to drain your pool for any of these repairs.
- Step 6: It is advisable to periodically swim around your pool with goggles to inspect the pool lights for any signs of leakage.
For more insights on maintaining your pool lighting system, explore our guide on “how to install a pool light“. Learn step-by-step instructions for proper installation and ensure your pool remains well-lit and safe for enjoyment.
Guide on Fixing a Leaking Pool Light
- Step 1: Remove the Lock-Screw: Start by using a screwdriver to loosen and remove the locking screw that securely holds the pool light in place.
- Step 2: Extract the Light: Gently pull the pool light out of the pool wall, ensuring the cable is long enough to reach the pool’s edge. Place the light on a dry towel.
- Step 3: Remove the Lens’ Frame: Disassemble the light by removing the frame of the lens. This will grant access to the gasket that may be causing the leak.
- Step 4: Inspect and Replace the Gasket: Identify the warped or broken gasket within the housing unit. Carefully remove the damaged gasket and replace it with a new one.
- Step 5: Reassemble the Housing Unit: Ensure all components are completely dry before reassembling the housing unit. Any residual moisture can contribute to future leaks.
- Step 6: Reinsert the Housing Unit: Place the housing unit back into the pool wall, positioning it securely.
- Step 7: Refasten the Lock-Screw: Secure the housing component into place by using a screwdriver to tighten the locking screw. Tighten it to ensure a snug fit and prevent any further leaks.

Guide to fixing a Loose Pool Light Fixture
- Step 1: Prepare Tools: Keep a Phillips screwdriver and protective goggles within reach, placing them on a dry towel at the edge of the pool.
- Step 2: Put on Goggles: Prior to addressing the loose fixture, ensure your safety by putting on protective goggles.
- Step 3: Enter the Pool: Position yourself in the pool, right beside the fixture that is showing signs of wobbling.
- Step 4: Locate the Lock-Screw: Identify the lock-screw on the fixture. This is a single screw situated at the top of the fixture’s face, connecting the pool light to the wall.
- Step 5: Tighten the Lock-Screw: Using the Phillips screwdriver, carefully tighten the lock-screw as much as possible. Ensure it is securely fastened to eliminate any wobbling.
Guide to fixing a Pool Light Bulb out

Detailed Steps for Diagnosing and Fixing a Pool Light Bulb Issue:
- Step 1: Check Breaker Box: Start by inspecting your breaker box. If the pool light is still not working, it’s likely that the bulb has burned out.
- Step 2: Unscrew Housing Unit: Unscrew the housing unit of the pool light and carefully place it on a dry towel located at the edge of the pool, within easy reach.
- Step 3: Apply Dielectric Bulb Grease: Apply a small amount of dielectric bulb grease to the socket. This helps with conductivity and protects against corrosion.
- Step 4: Bulb Inspection: Remove the bulb from the socket and shake it next to your ear. If you hear a loose, jingling sound, it indicates that the bulb has burned out and needs replacement.
- Step 5: Remove Old Bulb: Unscrew the old bulb and place it on the dry towel for safe disposal.
- Step 6: Install New Bulb: Screw in a new bulb securely, ensuring it is properly seated in the socket.
- Step 7: Test the New Bulb: Quickly turn your pool’s power back on to test the new bulb. This should be done rapidly, as new bulbs may burn outside of water. It’s advisable to have someone observe the light while you’re turning the power back on.
Note:
- Pool lights are typically powered through a low-voltage transformer that converts the standard household electrical current (usually 120 or 240 volts) to a safer low voltage (often 12 volts). This transformation is crucial for safety, significantly reducing the risk of electric shock in a wet environment.
- For this pool light repair, having an additional person is beneficial. This individual can observe the pool light while you restore power. Additionally, consider obtaining dielectric bulb grease, as it facilitates the removal of bulbs, making the entire process smoother.
- Exercise extreme caution when dealing with electricity and water. Adhere to all safety precautions diligently, including turning off the power at the main circuit breaker. Clearly mark it to remain switched off throughout the duration of your work for enhanced safety.
Prioritizing Safety First
When embarking on pool light repairs, safety should be the utmost priority. Electric shock hazards associated with water and electricity demand the following precautions:
- Turn off the power: Detach the circuit breaker to cut off electricity to the pool lights.
- Wear protective gear: Utilize non-conductive tools and rubber-soled shoes for insulation.
- Keep the area dry: Prevent any water from coming into contact with electrical components.
- Check for electricity: Use a voltage tester to ensure the power is safely off before proceeding.
Know When to Call the Professionals
While some pool light issues, such as bulb replacement, can be tackled as a DIY project, it’s crucial to seek professional assistance for more complex situations:
- Wiring issues: Any suspected problems with electrical connections should be handled by a qualified electrician.
- Safety concerns: If you are unsure about any safety measures or repair steps, consult a professional to avoid potential hazards.
- Warranty coverage: Professional repairs may be necessary to maintain warranty coverage and ensure compliance with industry standards.
Troubleshooting and Repair Methods
1. Pool Light Not Working
- Check for a blown bulb: Replace the bulb if necessary.
- Inspect the electrical connection at the light niche: Ensure a secure connection.
- Test the circuit breaker: Verify if the breaker has tripped and reset it if needed.
2. Pool Light Flickering
- Loose connection: Check and tighten all connections.
- Faulty bulb: Replace the bulb with a new one.
- Electrical issues: Contact a qualified electrician for further troubleshooting.
3. Pool Light Not Turning On
- Check the power supply: Ensure the circuit breaker is on and supplying power to the light.
- Test the switch: Verify that the pool light switch is functioning correctly.
- Inspect wiring connections: Inspect and repair any loose or damaged wires.
4. Pool Light Green
- Algae growth: Clean the light fixture and housing to remove any algae buildup.
- Chemical imbalance: Adjust the pool chemistry to maintain proper levels.
- Faulty light gasket: Replace the gasket to prevent water seepage.
5. Pool Light Stuck
- Debris or scale accumulation: Remove any debris or calcium buildup from the light housing.
- Corrosion: Inspect for any signs of corrosion and clean or replace affected components.
- Stuck switch: Contact a professional to troubleshoot and fix the switch system.
6. Pool Light Won’t Turn Off
- Faulty timer: Replace the timer unit.
- Stuck switch: Contact a professional to repair or replace the switch.
- Electrical malfunction: Seek professional assistance for further electrical troubleshooting.
7. Pool Light Keeps Tripping Breaker
- Ground fault issue: Check for any ground faults in the electrical system and repair as needed.
- Overloaded circuit: Ensure the pool light is connected to a circuit that is not overloaded with other electrical devices.
- Contact a professional: Complex electrical issues require professional attention.
8. Pool Light Cord Repair
- Cut and splice: Cut and splice damaged wires with waterproof connectors.
- Replace cord: Replace the entire light cord if it is extensively damaged.
- Professional assistance: Contact a professional for safe and effective cord repair.”
FAQ:
Why Many Pool Service Companies Avoid Pool Light Repairs?
The reluctance of most pool service companies to provide pool lighting repair services is primarily rooted in the frequent occurrence of leaks in these fixtures.
Various factors contribute to these leaks, with one of the most prevalent causes being swimmers inadvertently kicking the lighting fixture, gradually loosening it over time.
This situation often leads to recurring service calls from homeowners perplexed by the reoccurring issue. The high callback rate associated with such repairs prompts many service companies to refrain from offering this particular service.
Can a homeowner replace a pool light independently?
Yes, homeowners can easily replace a pool light on their own. With proper planning and knowledge of the power source, housing type, and required bulb type, the replacement process can be completed in as little as 30 minutes.
Do you need to drain the pool to change a pool light?
No, there is no need to drain the pool to change a pool light. During installation, pool light housings are designed to have enough slack behind them, allowing them to rest on the deck for maintenance. This enables bulb replacement without the necessity of draining the pool or risking electrocution.
Is it possible to change a pool light in an in-ground pool?
Yes, it is entirely possible to change a pool light in an in-ground pool. With careful planning and proper identification of required parts, homeowners can successfully replace a pool light in an in-ground pool.
In conclusion, addressing pool light repair is a manageable task for homeowners, provided they adhere to safety precautions and follow a systematic approach. Whether it’s replacing a burnt-out bulb, fixing a leak, or securing a loose fixture, timely maintenance ensures a well-lit and enjoyable pool experience. For those curious about the lifespan of pool lights, explore more information on “how long do pool lights last” to gain insights into maximizing the longevity of your pool lighting system.